Adding Kibana/Elastic objects to ANALYTICS
Prior to pulling the most recent version from, or commiting edits to the ANALYTICS repo on the DIP, you will need to have completed the Initial Setup of the MIP with the DIP hosted Gitlab.
ANALYTICS/00_ELASTIC sub-folders
The ANALYTICS project contains sub-folders for different categories of analytics that will be pulled by the https://code.levelup.cce.af.mil/262-cos/dok/cvah-customizations project CI/CD pipeline to ultimately be automatically loaded into Elastic during the DIP build process.
All things Elastic related live under ANALYTICS/00_ELASTIC, where each of the sub-folders within this folder are meant to store specific types of objects:
ANALYTICS/00_ELASTIC/DETECTION_RULES: Elastic Detection Rules (.ndjson) exported from KibanaANALYTICS/00_ELASTIC/LOGSTASH_PIPELINES: Logstash Pipeline configuration files (.conf) for custom data pipelinesANALYTICS/00_ELASTIC/MACHINE_LEARNING_JOBS: Machine Learning Job settings (.json) exported from KibanaANALYTICS/00_ELASTIC/SAVED_OBJECTS: Dashboards, Visualizations, etc. (.ndjson/.json) exported from KibanaANALYTICS/00_ELASTIC/TIMELINE_TEMPLATES: Elastic Detection Timeline Templates (.ndjson) exported from Kibana
NOTE: If you want your custom creations to be added to the next DIP build, they must be added to the corresponding folder and commited to the Git repository
1. Create your own working branch
-
Change directories to the
/cvah/git/folder:cd /cvah/git/ -
Pull the
ANALYTICSproject from the DIP Gitlab to/cvah/git/ANALYTICS:git pull https://gitlab/262-cos/ANALYTICS.git -
Create a new branch of the current snapshot of the
mainbranch with name containing your username, then usecheckoutto switch to it:git branch <YOUR_USERNAME>-edits
git checkout <YOUR_USERNAME>-edits -
Publish your new branch to the DIP Gitlab:
git push --set-upstream origin <YOUR_USERNAME>-editsNOTE: You can skip this step if you do not have a connection to the DIP Gitlab.
2. Making changes in VS Code
-
Start VS Code and open the local
ANALYTICSrepository:code /cvah/git/ANALYTICSNOTE: You may be prompted to
Trust the authors of all files in the parent folder 'git'- check the box and click Yes -
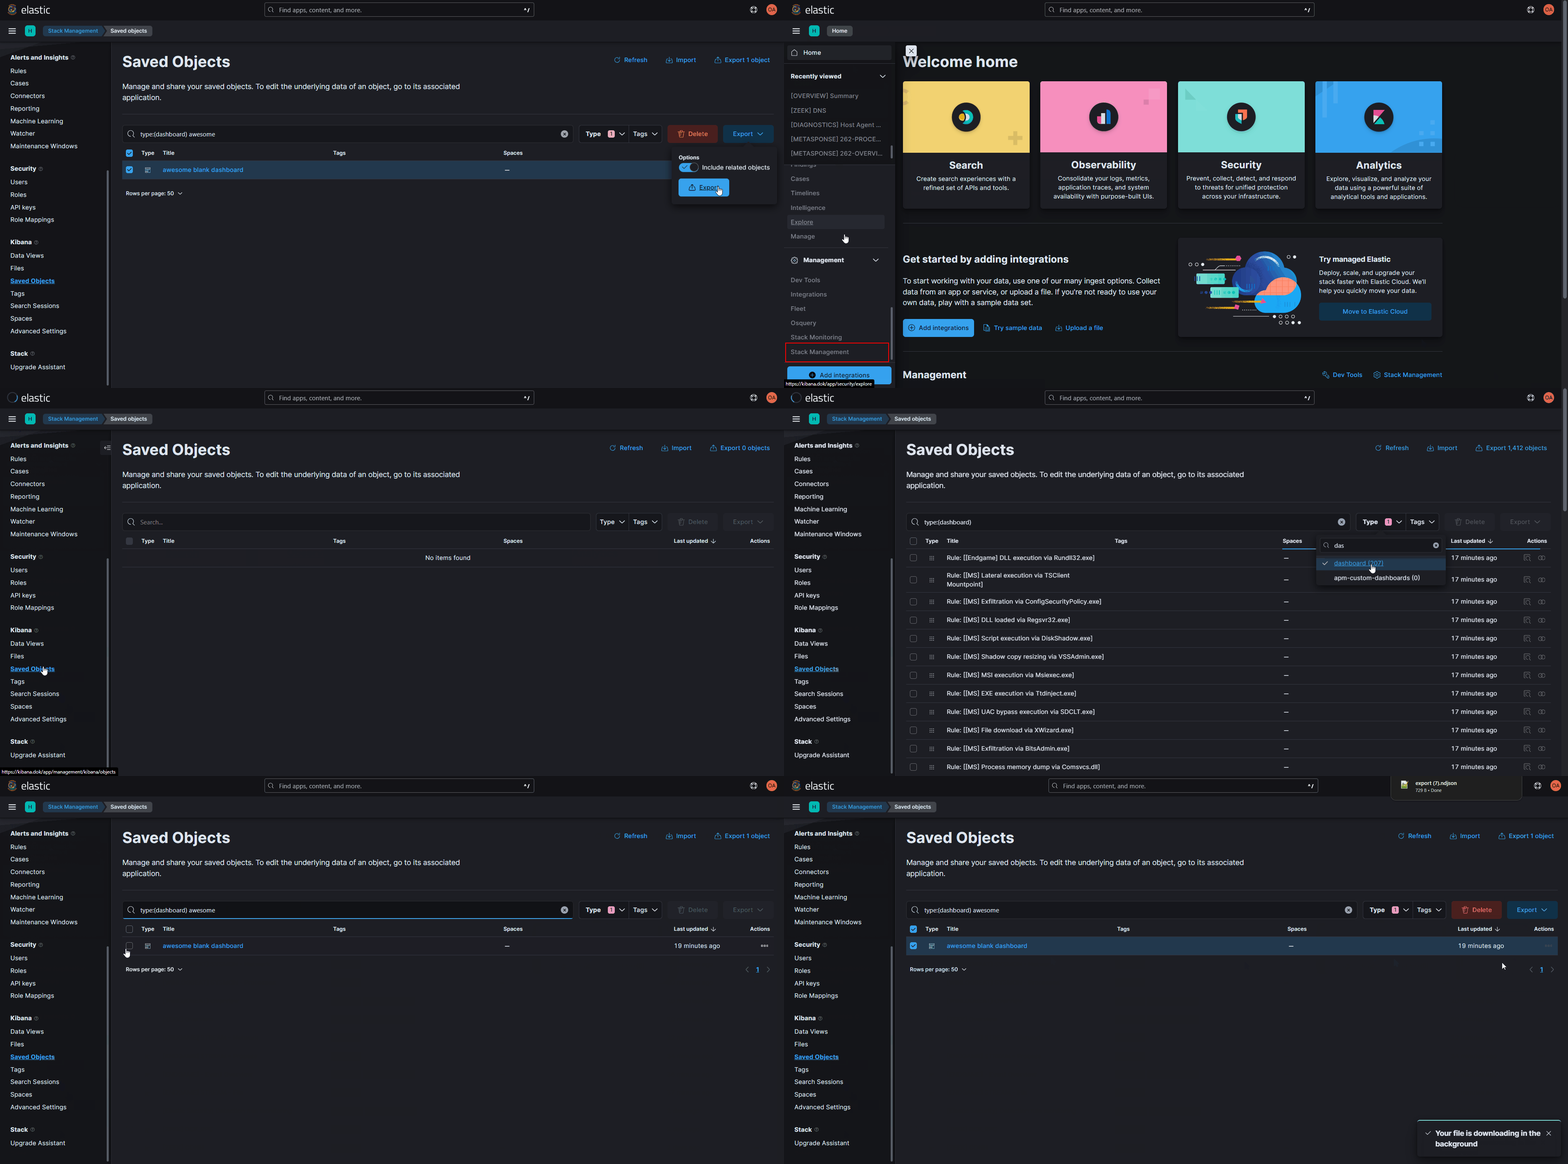
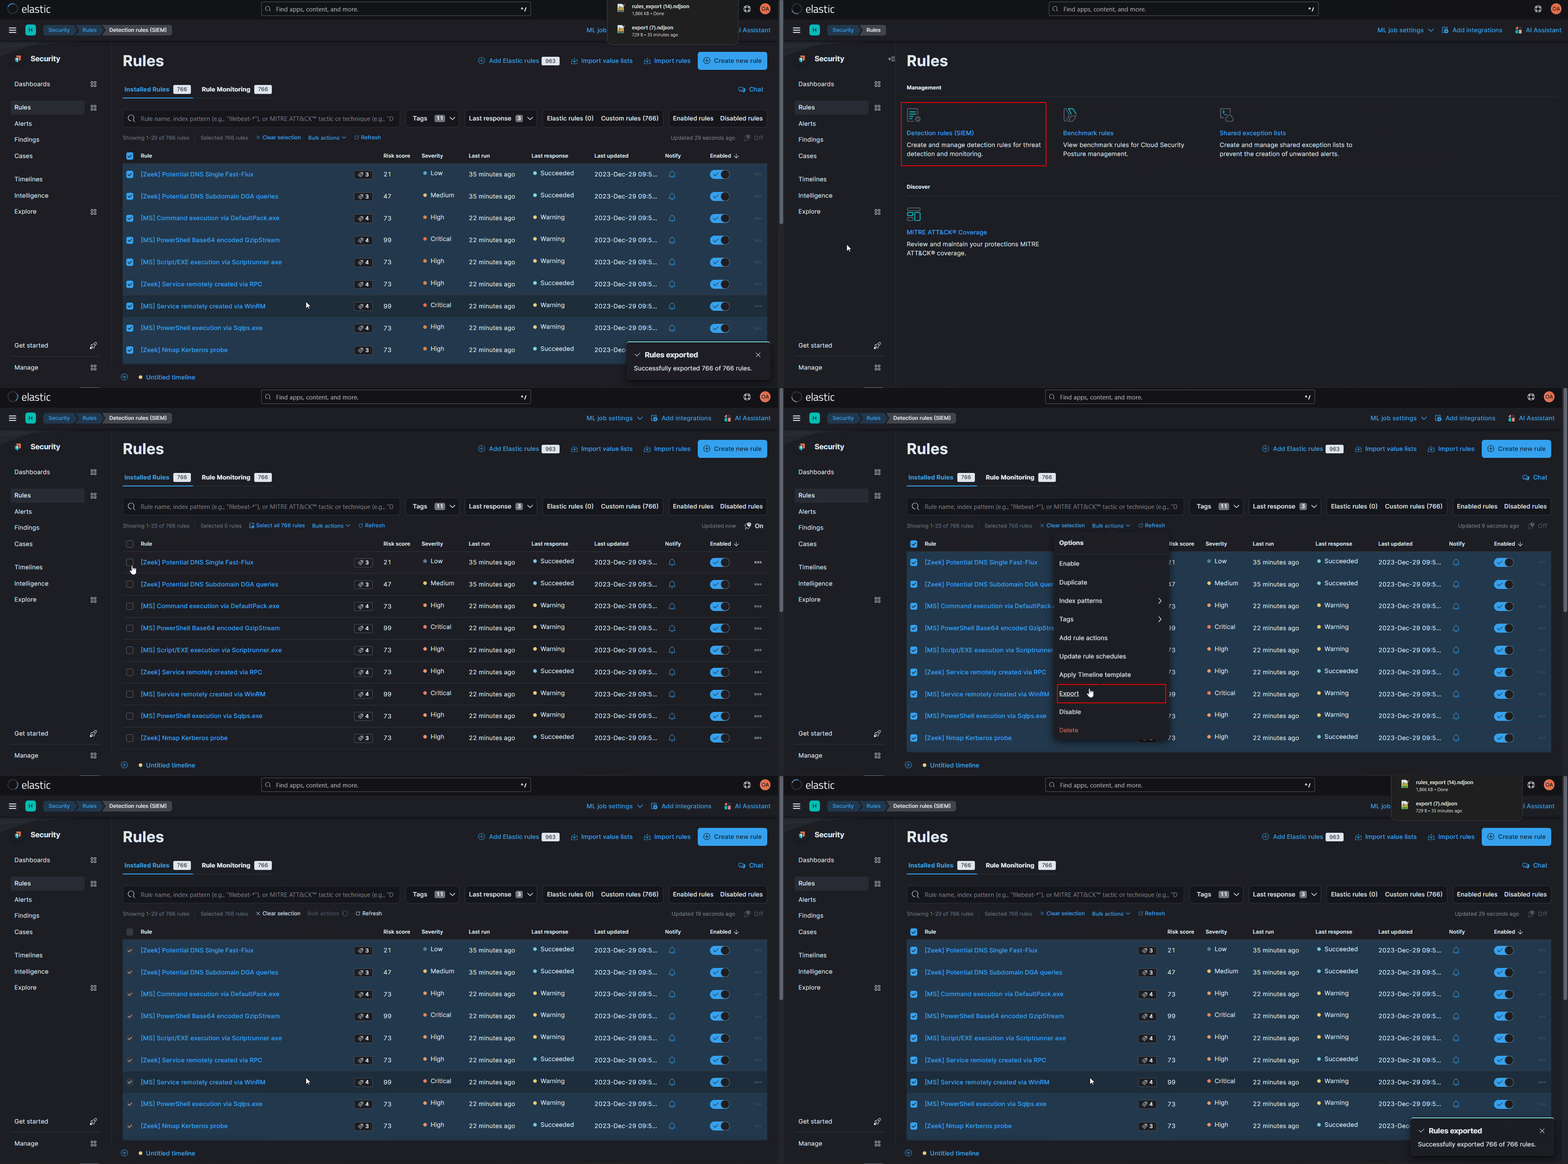
Copy/export the Elastic objects that you want to commit to the Git repository and save them to their corresponding folder
EXAMPLE: Exporting Kibana dashboards
EXAMPLE: Exporting Elastic Detection Rules
-
Commit and sync your changes via VS Code using the VS Code Fundamentals page as a reference